Directions
Are you craving a unique and satisfying breakfast dish? Look no further than the Japanese tamago egg recipe, which involves making tamagoyaki, a rolled omelette that is as visually appealing as it is delicious. The process is simple and requires a few basic ingredients that are commonly found in every kitchen. In this article, we will explore the step-by-step process of making tamagoyaki, the traditional method of using a tamagoyaki pan, alternative cooking options, and tips for achieving the perfect texture and flavor. So, let’s dive right in and discover the art of making tamagoyaki!
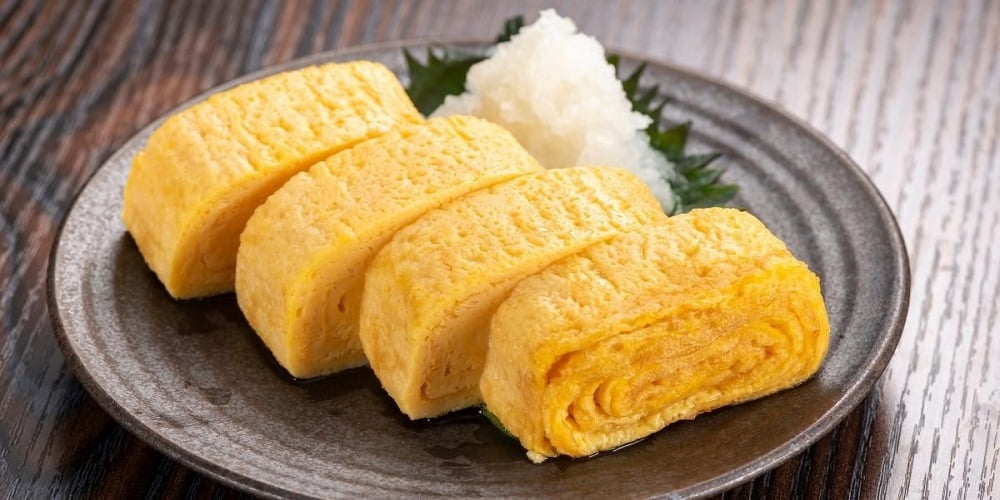
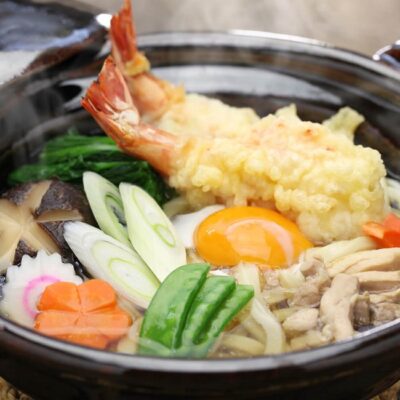
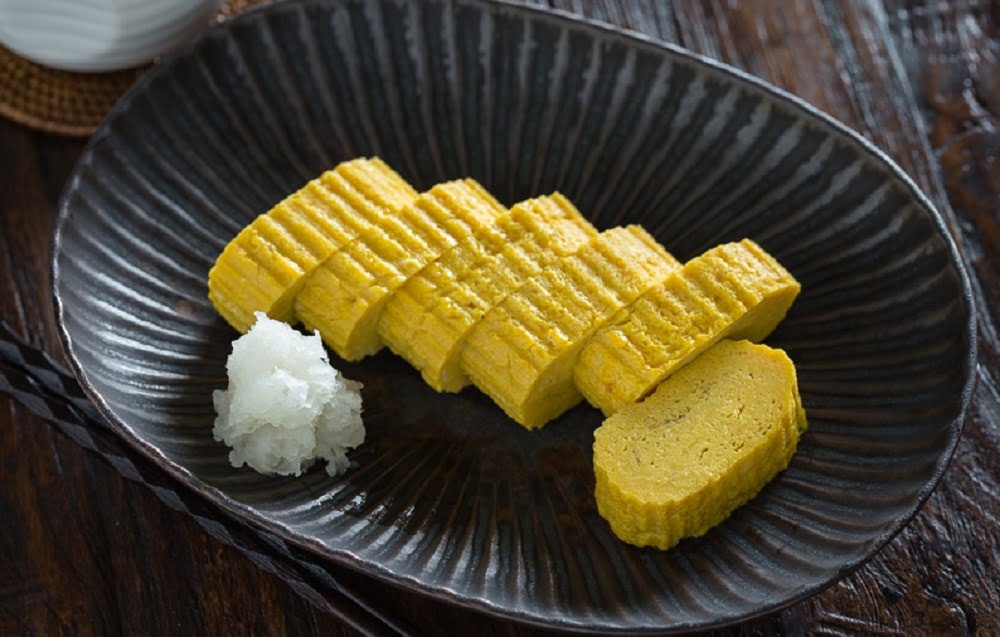
Tamagoyaki: A Feast for the Senses
Before we delve into the details of the recipe, let’s take a moment to appreciate the beauty and cultural significance of tamagoyaki. This traditional Japanese dish is not just a treat for the taste buds but also a delight for the eyes. The carefully rolled layers of egg, glistening with a golden sheen, create a visually stunning omelette that is irresistibly tempting.
The Ingredients: A Harmonious Blend of Flavors
To make tamagoyaki, you will need the following ingredients:
- Eggs: The star of the show, eggs form the base of the omelette and provide a smooth and custardy texture.
- Sugar: A touch of sweetness balances the overall flavor profile of tamagoyaki.
- Mirin: This sweet rice wine adds depth and richness to the dish.
- Soy Sauce: The umami-rich soy sauce enhances the savory notes of tamagoyaki.
- Salt: Just a pinch of salt is needed to bring out the flavors of the other ingredients.
- Dashi Stock (Optional): For an added layer of savory taste, dashi stock can be incorporated into the recipe.
The Basic Process: Whisk, Season, and Cook
Now that we have our ingredients ready, let’s move on to the step-by-step process of making tamagoyaki.
Steps
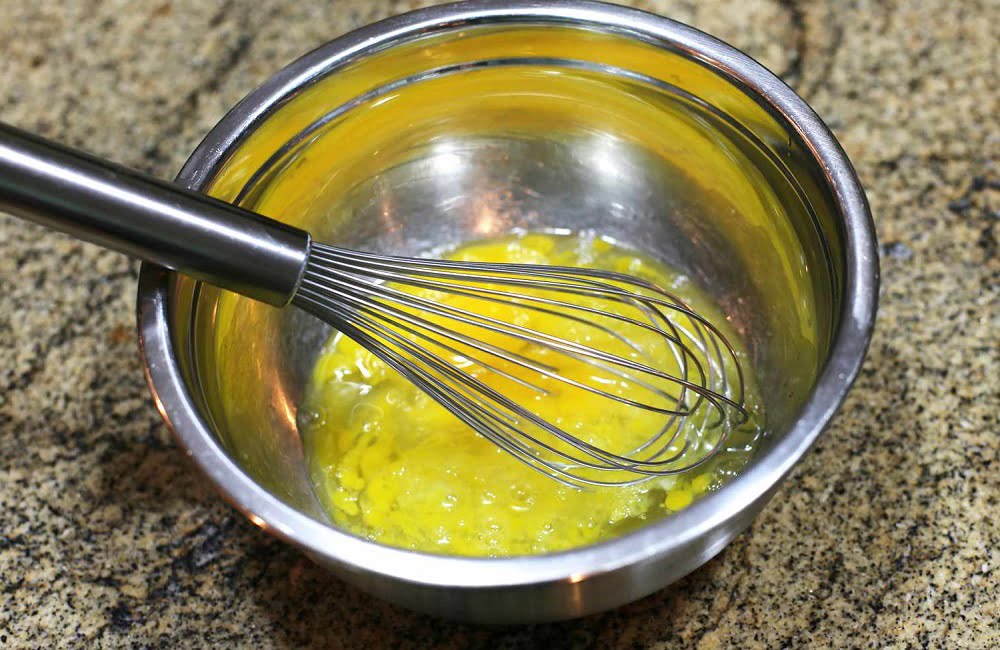
1 Done | Whisk the Eggs: In a bowl, whisk the eggs until they are well beaten and frothy. A fork or a pair of chopsticks can be used for whisking, but some cooks prefer using a wire whisk for a smoother texture. |
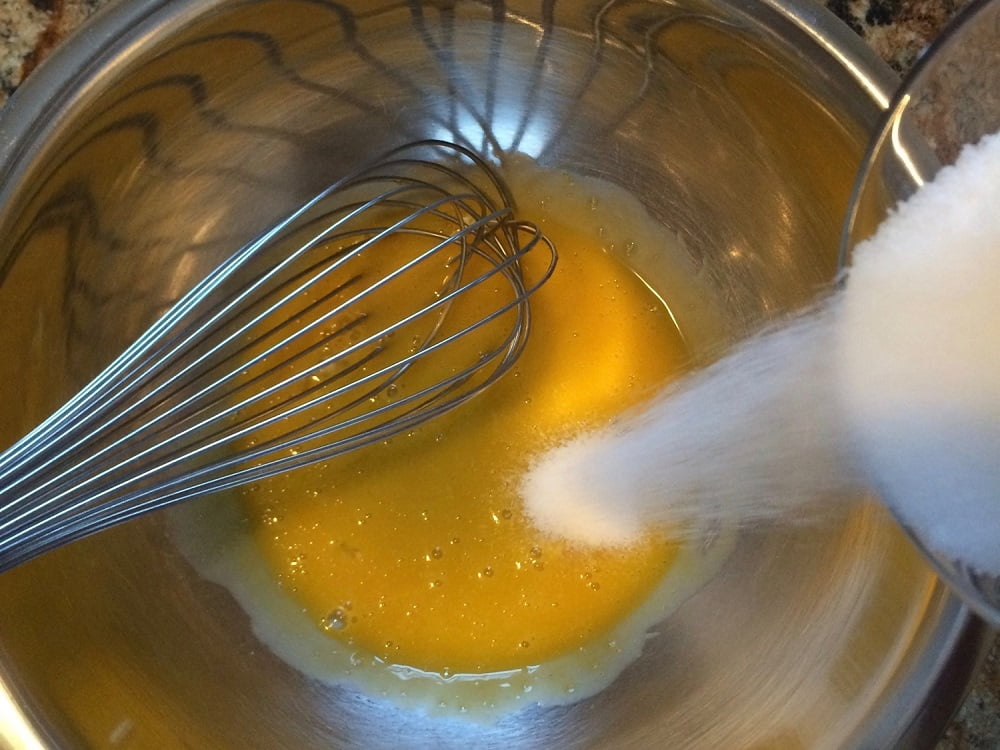
2 Done | Season with Sugar, Mirin, Soy Sauce, and Salt: Add sugar, mirin, soy sauce, and a pinch of salt to the whisked eggs. These ingredients will provide a perfect balance of sweetness, umami, and savory flavors. |
3 Done | Mix Well: Make sure all the ingredients are thoroughly combined. You can use a whisk or a fork to mix them together. |
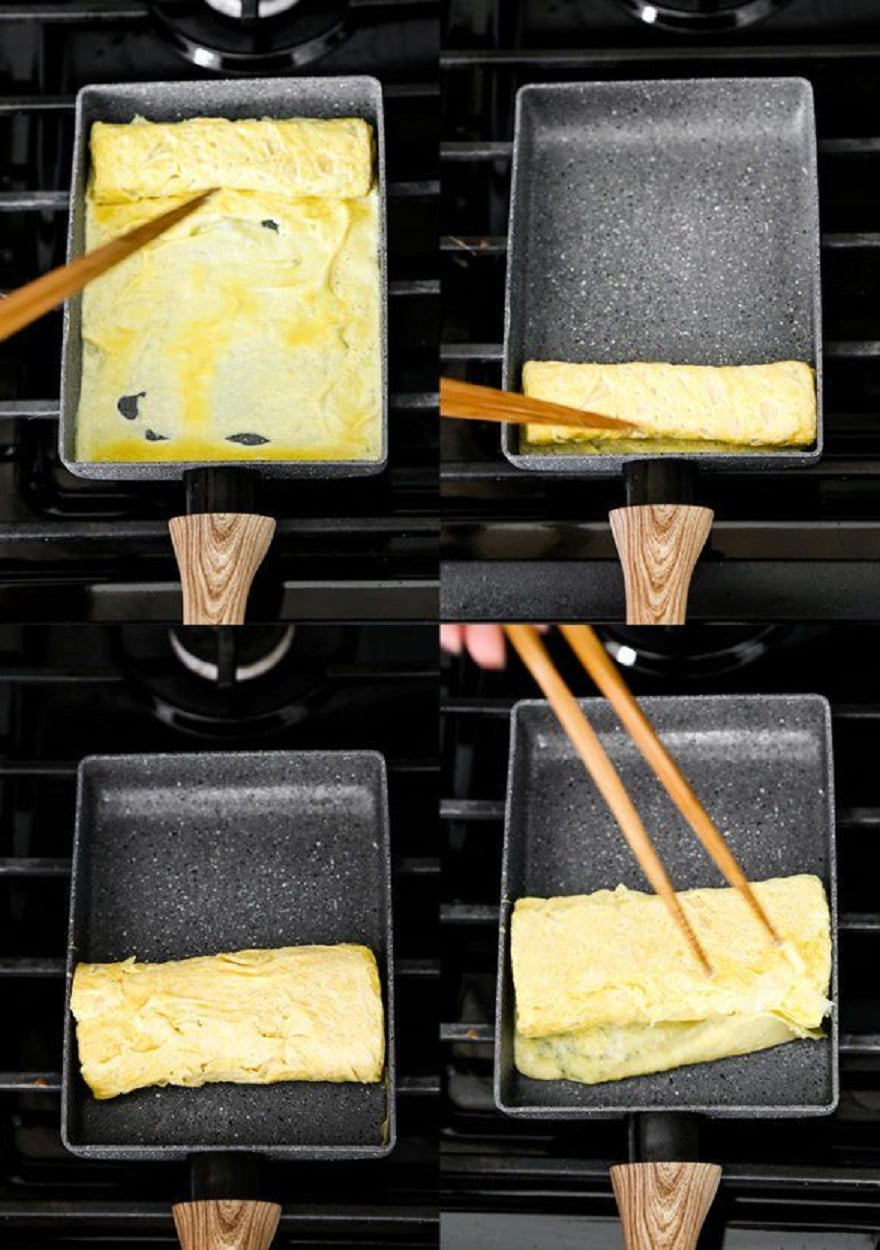
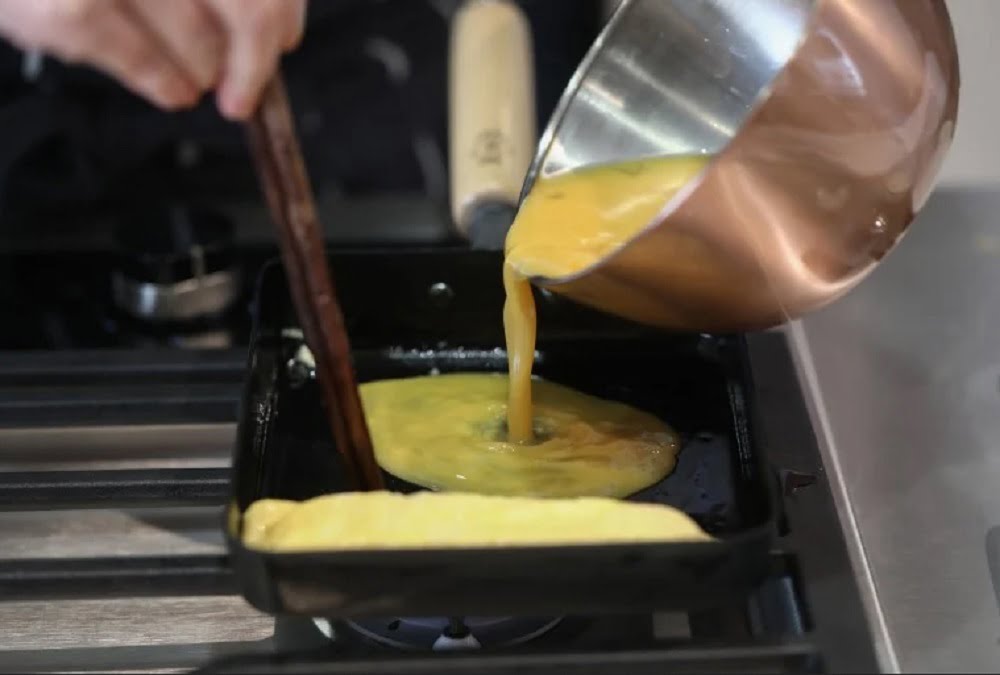
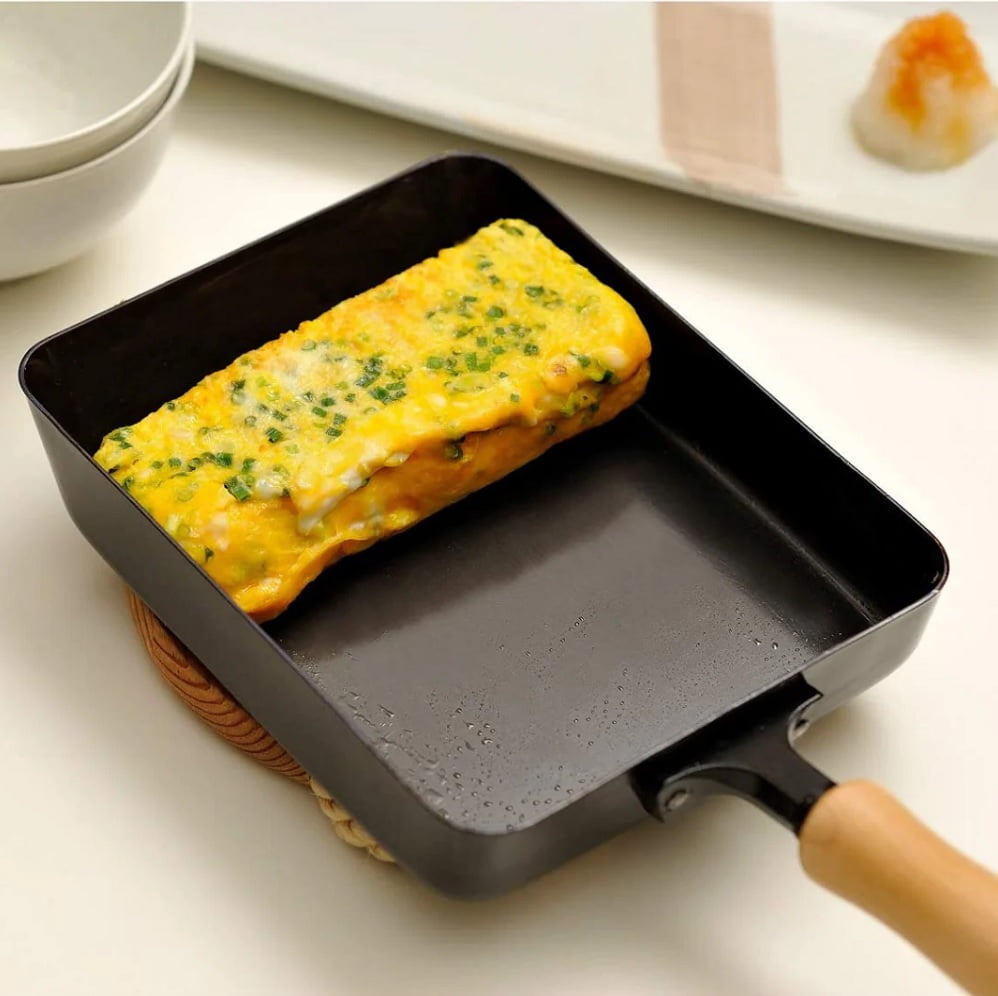
4 Done | Cook the Egg Mixture: Heat a tamagoyaki pan or a nonstick skillet over medium heat. Add a small amount of oil and swirl it around to coat the pan evenly. Pour a thin layer of the egg mixture into the pan. |
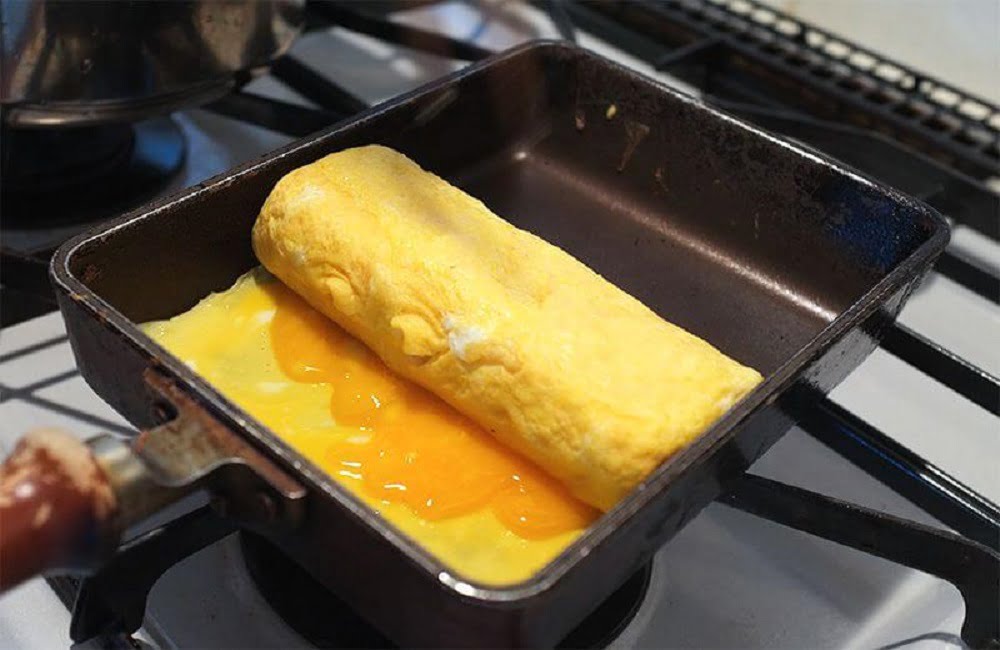
5 Done | Roll the Layer: As the egg starts to cook, gently roll it from one side to create a tight spiral shape. Push the rolled layer to one side of the pan. |
6 Done | Add Another Layer: Pour another thin layer of the egg mixture into the empty side of the pan, making sure it flows under the rolled layer. Tilt the pan to distribute the egg evenly. |
7 Done | Roll Again: Once the new layer of egg starts to set, roll it tightly over the existing rolled layer. Repeat this process until all the egg mixture is used, creating multiple thin layers. |
8 Done | Keep it Neat and Consistent: Throughout the cooking process, try to maintain consistent color and depth in each layer. This attention to detail will result in an attractive final presentation. |
9 Done | Avoid Browning and Air Bubbles: To achieve a uniform appearance, use chopsticks to pop any air bubbles that may form and prevent the eggs from browning. The goal is to maintain an even, golden color throughout the omelette. |
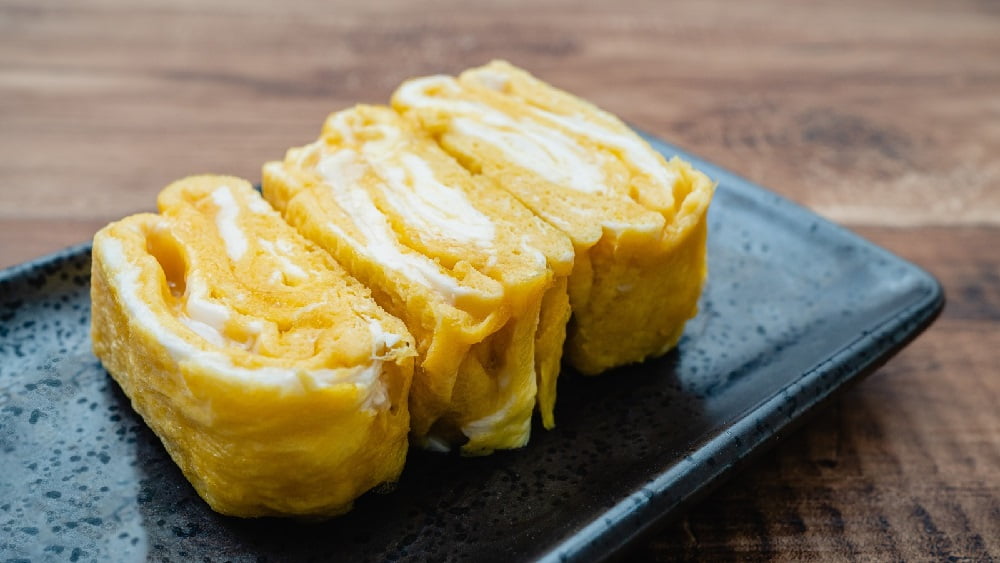
10 Done | Slice and Serve: Once the tamagoyaki is fully cooked, remove it from the pan and let it cool slightly. Slice it into bite-sized pieces and serve it as a standalone dish or as part of a delicious breakfast spread. |
11 Done | Alternative Recipe: Dashi Stock for Authentic FlavorWhile the previous recipe is a popular and simplified version of tamagoyaki, some cooks prefer using dashi stock to enhance the authentic flavor of the omelette. If you want to try this alternative recipe, follow these steps: |
12 Done | Tips and Tricks: Mastering the Art of TamagoyakiMaking tamagoyaki is an art form that requires practice, patience, and attention to detail. Here are some additional tips and tricks to help you create the perfect rolled omelette: |
13 Done | Frequently Asked QuestionsQ: Can I make tamagoyaki without dashi stock? |
14 Done | The Japanese tamago egg recipe for making tamagoyaki is a culinary delight that combines simplicity with elegance. By whisking eggs, seasoning them with sugar, mirin, soy sauce, and salt, and cooking them in a pan, you can create a rolled omelette that is as visually stunning as it is delicious. Whether you choose to follow the basic recipe or experiment with alternative ingredients, mastering the art of tamagoyaki will bring a touch of Japanese cuisine to your breakfast table. So, gather your ingredients, channel your inner chef, and embark on a flavorful journey to create this traditional Japanese delight. Enjoy! |